Complete Guide for Direct Saving MBOX to iCloud

Have you ever tried the procedure to move your email data or MBOX into iCloud? In this blog post, you will reach that particular method through which you can easily get your complete mailboxes into iCloud app directly and safely.
With all types of elements of MBOX email files (attachments, email header & footer, hyperlinks, email images, and so on), you can transfer email data into iCloud through the utilization of the most reliable software i.e. MBOX Converter.
As the MBOX files can be extracted from multiple email clients like Mac Mail, Eudora, Mozilla Thunderbird, PostBox, SeaMonkey, etc. To convert all these email files together you need to utilize this advanced software. It is the safest method to get all email files into iCloud app instantly.
Manual Method V/S Converter Tool
Now, the query arises as that which method is suitable for the migration of MBOX email files? To understand this you have to follow both methods one by one. So I decide to share both of these methods with you. This will help you to understand the complete process and also provides an overview of both of these solutions.
In short words, I can say that sometimes the manual way is not good for large and important email files. And the converter all users to get complete email data with the same structural elements with a proper view.
Migrate MBOX Emails in iCloud Step by Step
First of all, you need to know that, if you are a Windows OS user, then you are required to download the Windows edition of the MBOX file migration software. And if you are using Mac OS for this process, then you can utilize the Mac edition step by step.
Convert MBOX to iCloud on Windows OS

- Download the Windows edition and start it.
- By utilizing the Add Files option choose those email files which you want to view in your iCloud account.
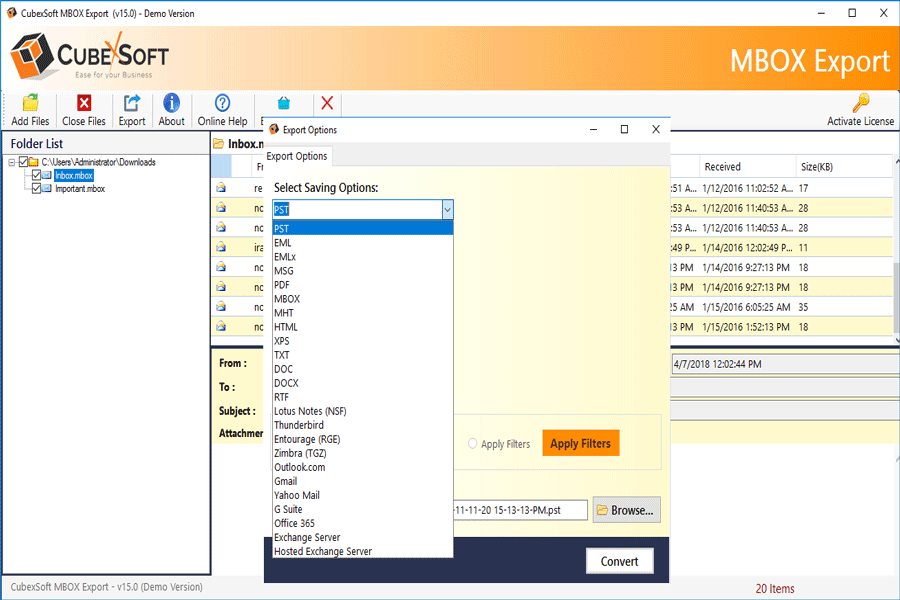
- Export tab will allow you to choose the IMAP (iCloud) option.
- Enter the complete email client details like Login and Password so that this process can be done directly.
- Utilize advanced options like filter section and click the Convert tab to start this process.
Helping Note: There is no limitation for the migration of email files through this process. You can choose that folder also where you have saved your complete email data.
Move MBOX to iCloud on Mac OS Instantly

- For this, first, download the Mac edition of the software.
- Now, Add File(s) or Add Folder(s).
- Select/Deselect the loaded files from the next screen.
- Choose the IMAP option from the Select Saving Options section.
- Utilize other options and enter the related account details.
- Click the Export tab and wait for the completion of this process.
Helping Note: This edition of the software allows you to save complete mailbox or batch MBOX data. No change in the steps of any type of MBOX data. Large email files can be moved with other emails directly.
Manual Method to Save MBOX Emails in iCloud
You can only save emails of Mozilla Thunderbird emails into iCloud with the manual method. So, if you want to view your Mozilla Thunderbird emails in iCloud account, then you can follow these steps:
- Start Mozilla Thunderbird and Setup iCloud account in it.
- Now with the help of Add Ons go with the ImportExport NG Plugin.
- After enabling the plugin move towards the Dashboard.
- Right-click the folder and select the Import Folder option.
- Browse the .mbox data and save it into Mozilla Thunderbird.
As you have set up our cloud account to your Thunderbird account the iCloud (IMAP) account will show you the complete emails.
Wrap-up Words
In this complete discussion, we have added all possible methods to get MBOX email data into iCloud app directly and safely.
I recommend the method of automated software. This will help you to get your email data into IMAP or iCloud within some simple steps. You can utilize the demo functionality of these tools and decide the method yourself.


